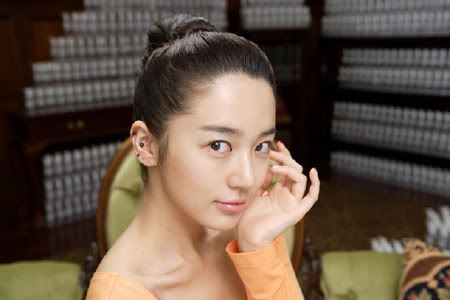
Hi guys! In my recent post I told you about some basic information
regarding the Korean makeup trend that is getting popular not only in Asia but
in western countries as well. Now that I have already shared some of my insights
as well as tips in order to achieve this look, let me take you further by sharing
some of my step-by–step tutorials, starting on the eyebrows.
Korean eyebrows, as I have mentioned, have been gaining popularity
for giving this youthful look that has been strongly distinct in Koreans these days.The
idea of having straight, bushy eyebrows can be a little daunting to some
(especially for women) but Koreans in contrary have been totally rocking the
look. Since
most Asians, particularly the ones from the East have relatively soft facial
features, thick, defined brows can actually accentuate the features
as well as giving off a better frame to the face.
Here are some photos of famous Korean actresses and k-pop artists who are rocking the scene with these thick,straight brows:
 |
| SNSD's Yuri |
 |
| Actress Moon Geun Young |
 |
| Singer/Actress Yun Eun Hye |
| Singer IU |
To achieve this look, let's start by grooming the eyebrows:)
 |
| So before anything else, here's a view of those godforsaken brows, un-groomed. |
TOOLS YOU'LL NEED:  |
1.
Eyebrow or eyelash brush (whichever is
available. You can also use a spoolie)
2.
An eyebrow shaver of your choice
3.
Eyebrow scissors
|
 |
1.
Using the eyebrow shaver, carefully push the
hairs from the sides towards your eyebrows. This will help you gather more
hair. It is also important for the periphery of your brows to be clean so that
the entire focus is directed to your brows.
|
 |
2. Place the blade side of the shaver parallel to the
outer part of the brows and gently glide it over in a horizontal motion. It is
best to use a shaver with a longer blade so that it’ll be easy for you to achieve evenly straight eyebrows.
|
 |
3.
For the inner part of your brows, you’ll still want your natural arch so there’s no need to actually straighten it. Just remove those stubborn
hair.
|
 |
4.
Use the eyebrow brush to tousle your eyebrows,
particularly from the middle thirds to the end. This will help you check for
longer, uneven strands. Snip the ends off with your eyebrow scissors. You want
a clean, matted look for your eyebrows. With shorter, even strands, it’ll be
easier for you to fill in the brows.

*nice aim you got there blogger*
|
 |
5.
Make sure to check if your eyebrows are even (or
at least somewhat proportional). Once your done, you can start filling in your browsJ
(I’ll be filling in my brows into two different shades. Let’s see the difference ^.^)
FOR MORE NATURAL
EYEBROWS (especially for those with black/dark colored hair):
I prefer eyebrow pencil, eyebrow crayon or eyebrow powder in shades of grey. Avoid using a solid black color in filling in for it can give off an intense look for the brows. Grey is a perfect shade for natural, yet softer looking eyebrows. For this tutorial I used [1]Etude House's Drawing Eyebrow Pencil in #5 Grey
  
1.
Start on the outer side of your brows by lightly
drawing a straight line from the outermost area going in. Do the same
on the lower, slowly building a lighter to a darker gradient as you go in.
 
2.
For more precise eyebrows, increase your stroke
starting from the middle to the ends of your brows. You can use a darker shade
of grey for this as well.

3.
Remove harsh edges using the spoolie.
FOR A MORE BRIGHTER, FRESHER LOOK (or for people with
brown/lighter colored hair) YOU’LL NEED:
Your choice of eyebrow pencil in shades of
brown. I used two different shades here: a light one( [2]Nichido Minerals/Precise
Eyebrow Pencil in chestnut) and a darker one ([3]. Nichido Minerals/Precise Eyebrow
Pencil in Tiger Eyes)

1. Do the same step in filling in your brows by using the light brown pencil first in filling the outer most area, going in. Apply the darker brown starting on the middle third up to the ends for more precise eyebrows.
|

 |
 |
2.
Remove harsh edges using a spoolie.
|
I really hope you appreciate the difference between the two. Sorry for the bad lighting the poor camera resolution and for that face. I really have to slightly increase the brightness of the photos for you to see the difference, hope you guys don't mind:)


( please excuse ze hideous forehead)
Here's the side where I used the grey-colored liner. You can see that although the eyebrows are completely filled in, the grey made my brow still look soft and natural.

And here's the other side where I used the brown eyebrow pencils to fill in my brows. Notice how brown brightens my face. It doesn't look as natural as the first one but filling in your brows with this shade is perfect for brightening the face and of course for those who have brown/light colored hair.

Ack. 0_0
I personally do not wear this look often although I have to admit that this eyebrow style really frames my face well as it also enhances the shape of my eyes. Unfortunately, I do not recommend this eyebrow style to women with strong facial features.As I have mentioned, Koreans developed this style to accentuate their weaker facial features, so for women with stronger ones, instead of this eyebrow style complimenting your face, you'll end up looking angry the whole time you wear it.
But if you still want to achieve that youthful look, I suggest you slightly fill in your brows with two shades lighter than your hair color. Look for the highest point of your natural arch and slightly fill in. This will actually soften the arch of your brows without completely removing it's natural curve. Not all Koreans wear this look so don't stress too much on this alright? You'd still want eyebrows that would really compliment your face.
So this is my take on Korean Eyebrows. I know it's easier explaining this through video but you know, I'm like this shy, teenage virgin with a lot of occasional blunders in her life.-_- yieeaaah...but i hope this helps:) I'll be making reviews on some of the products I used for this tutorial so stay tuned^.^
Til next time
ARBE
Wow Arbe! Thanks for the tips! I badly need this! Because as you know, I look like I don't have eyebrows like Joseph! Lol!
ReplyDeleteI want the brown one on you! Really looks good! I wish I can achieve this look!
Arra
theprincessonthebrink.blogspot.com
Nice! Thanks for this!
ReplyDeletenice tutorial! like it
ReplyDeletevisit my blog ^^
www.luchluchcraft.blogspot.com
Your eyebrows were already pretty before all the cutting and make up lol! I'm a korean girl and I'm one of the rarest who have bushy and thick eyebrows T^T
ReplyDeletehi, i have natural round well shaped eyebrows. I dont need to groom it since every strand is on its place. its weird but its true! LOL! I want to reshape it in straight as well but i cant find a way. =( I have long face but websites says flat/straight eyebrows is best for me. Can you suggest what part to shave and where to fill in? you dont need to see my eyebrows. just google round eyebrows and that's exactly how my brows looks like. thanks!!
ReplyDeleteHi there! For round eyebrows like yours I think you should decide first where would you want to put the 'actual' arch of your brows. I suggest the best area for this would be the outer corner of your eyes. Take your brow pencil, place it on the tip of your nose and line it diagonally to your pupils. The other end of the pencil is where your arch should be. Straight brows can be a bit tricky sometimes (sucks for me i have to deal with them, meh) so i think sticking with an arched brow is best especially because it's the part of the brows that gives dimension to the face.
DeleteWith regards to your round shaped brows, you can straighten it by tweezing (yes, tweezing) following a straight line from inside going outside. I think tweezing it can give your more control at how much hair you need to remove unlike using an eyebrow razor. Do the same on the inner portion of the brows BUT be careful not to tweeze the middle portion. So concentrate on the inner portion, skip the middle area, then tweeze again on the outer area before the actual arch. Just continue grooming your brows this way. Hair growth will follow your desired brow shape.
I hope this helps dear :) Thanks for reading
This comment has been removed by the author.
ReplyDeleteHi, i have an arched eyebrow, but i want to try out thw straight eyebrow. Do u have any tips on how to change an arched eyebrow into a straighter ones? Yours is... pretty much straight even without grooming it lol. Every tutorials i look through they all have an already straight eyebrows.
ReplyDeleteThanks :)
This comment has been removed by the author.
ReplyDeleteHi there! Well first of all, you are lucky to have arched brows :) I dunno i think its all about personal preferences. I on the other hand have dead-on straight brows ever since so it kind of burdens me sometimes, especially whenever i want to try different looks and my brows are just...-_-
ReplyDeleteanyways you can achieve straighter brows in two ways. 1.) Concentrate grooming your brows on the inner portion (near the bridge of the nose) going out. Be careful not to groom on the highest point of the arch. If your're happy with the shape, continue grooming this way and hair growth will follow suit. 2.) you can always tweak your brows by using eyebrow pencil. shade the inner portion of your brows on the highest point of the arch. That way, the sharpness of the arch will lessen.
hope this helps dear! Goodluck :)
Thanks to sharing such information with us. I hope you will share more information in future
ReplyDeleteThe KO Shop Australia Pty Ltd began its journey in 2014, as a boutique gift store. Since inception, The KO Shop directly imported and retailed high quality leather goods, hand crafted silver jewellery, singing bowls, wooden toys, clothing, handicraft works etc, from India, Nepal & Fiji. Over years, the range of imported goods expanded, and The KO Shop ventured into distribution.
ReplyDeleteaustralian wholesale smudge bowls